Kha Shmup Tutorial Part 9
We finished adding score to our main game, so now let’s start wrapping up by adding a main menu.
We are going to be changing our UIManager a little bit to accomodate these changes. This UIManager is pretty naive - we are assuming quite a bit in this tutorial making a few things easier for us:
- The screen will remain at 800x600 and we do not have to worry about additional resolutions or resizing.
- We only have a few elements we need to render, and thus hardcoding values in a couple places will be easier than spending the time to create a more versatile and generic solution.
Developing a robust UI can be a pretty lengthy topic on its own, you may want to use something like zui or haxeui (which currently doesn’t support Kha, but is supposed to be coming in version 2).
Developing a more customized solution may be a fun project for your own game, but for now we’re just going to hammer out a solution that works for us for the time being:
UIManager.hx
package;

import kha.Font;
import kha.graphics2.Graphics;

class UIManager {
  private static inline var scoreX = 10;
  private static inline var scoreY = 10;
  private static inline var titleY = 60;
  private static inline var titleStr = "Kha Shmup";
  private static inline var keysStr = "Arrow Keys to move, Z key to shoot.";
  private static inline var keysY = 130;
  private static inline var startStr = "Press Z to start.";
  private static inline var startY = 100;

  public var font: Font;
  public var scoreSize: Int;
  public var titleSize: Int;
  public var instructionSize: Int;
  public var viewport: Rectangle;

  private var score: Int;

  public function new(font: Font, scoreSize: Int, titleSize: Int,
                      instructionSize: Int, viewport: Rectangle) {
    this.font = font;
    this.scoreSize = scoreSize;
    this.titleSize = titleSize;
    this.instructionSize = instructionSize;
    this.viewport = viewport;
  }

  public function scoreUp(): Void {
    score += 1;
  }

  public function renderScore(g: Graphics): Void {
    g.font = font;
    g.fontSize = scoreSize;
    g.drawString("score: " + score, viewport.x + scoreX, viewport.y + scoreY);
  }

  public function renderMainMenu(g: Graphics): Void {
    g.font = font;
    g.fontSize = titleSize;
    var x = viewport.x + Math.round(viewport.width / 2);

    var titleW = g.font.width(titleSize, titleStr);
    g.drawString(titleStr, x - Math.round(titleW / 2), viewport.y + titleY);

    g.fontSize = instructionSize;
    var keysW = g.font.width(instructionSize, keysStr);
    g.drawString(keysStr, x - Math.round(keysW / 2), viewport.height - keysY);

    var startW = g.font.width(instructionSize, startStr);
    g.drawString(startStr, x - Math.round(startW / 2), viewport.height - startY);
  }

  public function reset(): Void {
    score = 0;
  }
}
The biggest changes is instead of a render method, we have shifted to rendering the main menu, or rendering the score. Notice the g.font.width method - this method will give you the width of a string when rendered using the set font, as well as a provided font size. There is also a corresponding height method.
We pretty much hardcore where the text is going to appear, with a little bit of flexibility to adjust it given a viewport. We are manually justifying these labels, but you can see how you may allow the user to define ui elements and provide a justification.
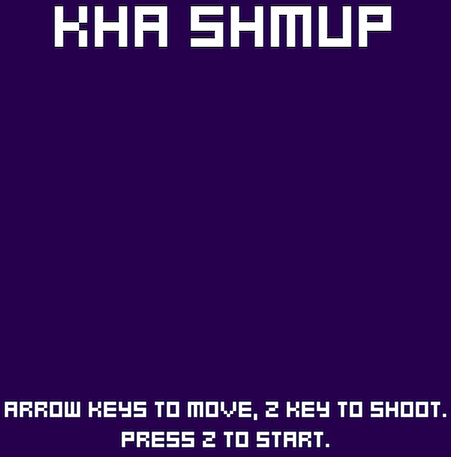
The two methods are pretty straight forward - renderScore is the same as this object’s previous render method, and renderMainMenu draws three lines - the title, instructions, and what button to press to begin playing.
We are now going to adjust our main game class to account for different states, and to render and update differently:
KhaShmup.hx
package;

// ...
import kha.graphics2.Graphics;
// ...

enum GameState {
  Initializing;
  MainMenu;
  Playing;
  Over;
}

class KhaShmup {
  // ...
  private var gameState: GameState;
  // make sure to delete the 'initialized' var, as
  // gamestate will take care of what it was doing

  // ...
  private function loadingFinished(): Void {
    gameState = GameState.MainMenu;
    uiManager = new UIManager(Assets.fonts.kenpixel_mini_square, 20,
      80, 30,new Rectangle(0, 0, screenWidth, screenHeight));
    // ...
  }

  private function reset() {
    controls.reset();
    ship.reset(Std.int(screenWidth / 2) - Std.int(ship.width / 2),
      Std.int(screenHeight / 2) - Std.int(ship.height / 2));
    enemySpawner.reset();
    uiManager.rest();
    timer.reset();
  }

  private function renderMainMenu(g: Graphics): Void {
    uiManager.renderMainMenu(g);
  }

  private function renderPlaying(g: Graphics): Void {
    enemySpawner.render(g);
    ship.render(g);
    uiManager.renderScore(g);
  }

  public function render(framebuffer: Framebuffer): Void {
    if (Type.enumEq(gameState, GameState.Initializing)) {
      return;
    }

    var g = backbuffer.g2;

    // clear and draw to our backbuffer
    g.begin(bgColor);
    switch(gameState) {
    case GameState.MainMenu:
      renderMainMenu(g);
      updateMainMenu();
    case GameState.Playing:
      renderPlaying(g);
      updatePlaying();
    default:
      // no-op
    }
    g.end();

    // draw our backbuffer onto the active framebuffer
    framebuffer.g2.begin();
    Scaler.scale(backbuffer, framebuffer, System.screenRotation);
    framebuffer.g2.end();
  }

  private function updateMainMenu() {
    if (controls.shoot) {
      reset();
      gameState = GameState.Playing;
    }
  }

  private function updatePlaying() {
    timer.update();
    enemySpawner.update(timer.deltaTime);
    updateShip();
    handleCollisions();
  }
  // ...
}
The first major difference is the addition of a GameState enum. This will track what part of the game we are in, and what update and render methods to be called. We’ve also removed the initialized boolean variable as gameState will now take care of flagging when we are initialized.
We have adjusted our render method to check what state we are in and then call the added methods for rendering the main menu state, or the playing state (and we will add the game over state next time). We have also added a reset method - this is handy to set everything back to pretty close to how everything was upon initialization. We’re mostly using it to toggle the start button so the player doesn’t immediately shoot after moving through the menu, but this method will also be useful when we want to start the game over.
We now need to add a few reset methods to various classes.
Controls.hx
//...

class Controls {
 // ...
  public function reset() {
    left = false;
    right = false;
    up = false;
    down = false;
    shoot = false;
  }
  // ...
}
Ship.hx
// ...
class Ship {
  // ...
  public function reset(x: Int, y: Int) {
    this.x = x;
    this.y = y;

    if (gun != null) {
      gun.reset();
    }
  }
  // ...
}
Gun.hx
// ...
class Gun {
  // ...
  public function reset() {
    cooldownLeft = 0;
    for (bullet in bullets) {
      bullet.isActive = false;
    }
  }
  // ...
}
EnemySpawner.hx
// ...
class EnemySpawner {
  // ...
  public function reset() {
    currentTime = 0;
    spawnNextTime = generateRandomSpawnTime(spawnMinTime, spawnMaxTime);
    for (enemy in enemies) {
      enemy.isActive = false;
    }
  }
  // ...
}
Running the Application
After our current changest you should see a main menu and you should be able to press Z to move to playing the game.
As always, check out my part 9 branch if you’re having issues: https://github.com/jamiltron/KhaShmup/tree/part-9
We have one more state to add to the game before putting on the finishing touches, which is the promised game-over state.
